Professional PPF Installation Timeline and Process
You've decided to protect your vehicle with paint protection film, and now you're wondering what actually happens during the PPF installation process. It's a bigger commitment than a quick car wash, and understanding the timeline helps you plan accordingly.
The truth is, professional PPF installation is a detailed process that requires precision, proper preparation, and adequate time for the film to cure correctly. Rushing any part of the PPF installation process compromises the final result and the protection you're paying for.
At A&G Auto Spa, we've refined the installation approach to deliver flawless results while respecting your time. Let's walk through what happens from the moment you reach out to when you drive away with a fully protected vehicle.
Initial Consultation: Setting Expectations and Coverage Options
The PPF installation process begins before your vehicle ever enters the shop. The consultation phase establishes what coverage you need, what your vehicle requires, and what you can expect throughout the installation.
During this phase, you'll discuss which paint protection film package makes sense for your vehicle and driving habits. Some owners want full vehicle coverage for maximum protection, while others focus on high-impact areas like the front bumper, hood, and fenders. Your usage patterns matter here—daily highway commuters face different risks than weekend garage queens.
This conversation also covers your vehicle's current condition. Existing paint damage, rock chips, or marks need addressing before film application. Paint protection film preserves your paint's current state but doesn't fix existing problems. If your vehicle needs paint correction, that becomes part of the planning discussion.
The consultation sets realistic expectations about the overall process. Different coverage levels and your vehicle's specific make and model affect complexity. Custom work requires more attention than standard applications, and that's something you'll understand clearly before committing.
Vehicle Drop-Off and Initial Inspection
When you bring your vehicle in for the PPF installation process, the first step involves a thorough inspection of the paint surface. The installation team examines every panel that will receive film, looking for issues that might affect adhesion or final appearance.
This inspection catches things that weren't visible during the initial consultation. Sometimes lighting in a shop reveals swirl marks, contamination, or other surface problems that need addressing. Better to identify these issues now than discover them after film installation when correction becomes much more difficult.
You'll discuss any findings from this inspection and understand how they affect the installation plan. Minor surface issues might require light polishing. More significant problems could need paint correction services before the PPF installation process continues. Transparency at this stage prevents surprises and ensures you get the results you expect.
The inspection also includes documenting your vehicle's condition with photos. This documentation protects both you and the installation facility, creating a clear record of the vehicle's state before work begins.
Surface Preparation: Creating the Perfect Foundation
Surface preparation represents one of the most critical phases of the PPF installation process, even though customers never see this work. The paint must be absolutely clean and properly prepared for the film to adhere correctly and look flawless.
The preparation starts with a thorough wash that removes all surface dirt, grime, and loose contaminants. This isn't your weekend driveway wash—it's a detailed cleaning that ensures nothing interferes with film adhesion. Every panel receiving film gets special attention because even tiny particles can create problems under the film.
After washing, the paint undergoes decontamination to remove embedded particles that washing alone can't eliminate. This step addresses things like
- Industrial fallout and rail dust
- Tree sap and tar residue
- Overspray and paint mist
- Road contaminants are bonded to the paint
The final preparation step involves panel wiping with specialized solutions that remove any remaining oils or residues. Paint must be completely clean at the molecular level for proper film adhesion. This preparation work takes time but makes the difference between a film that lasts and a film that fails prematurely.
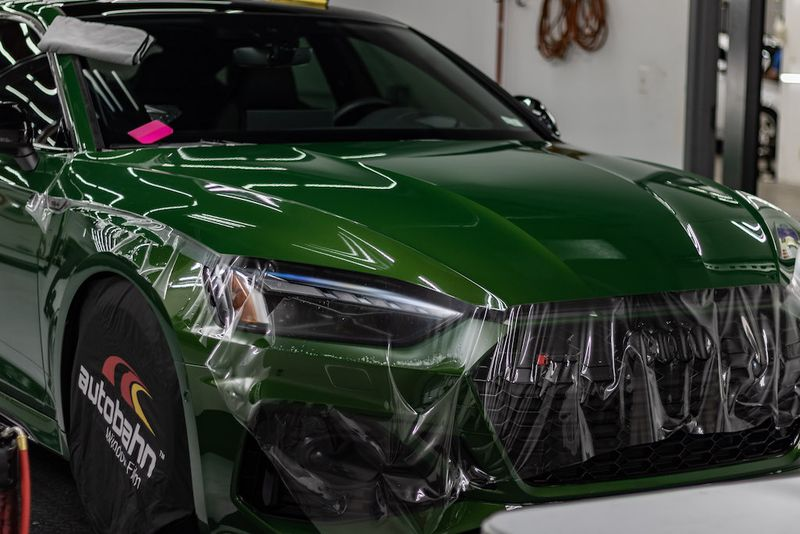
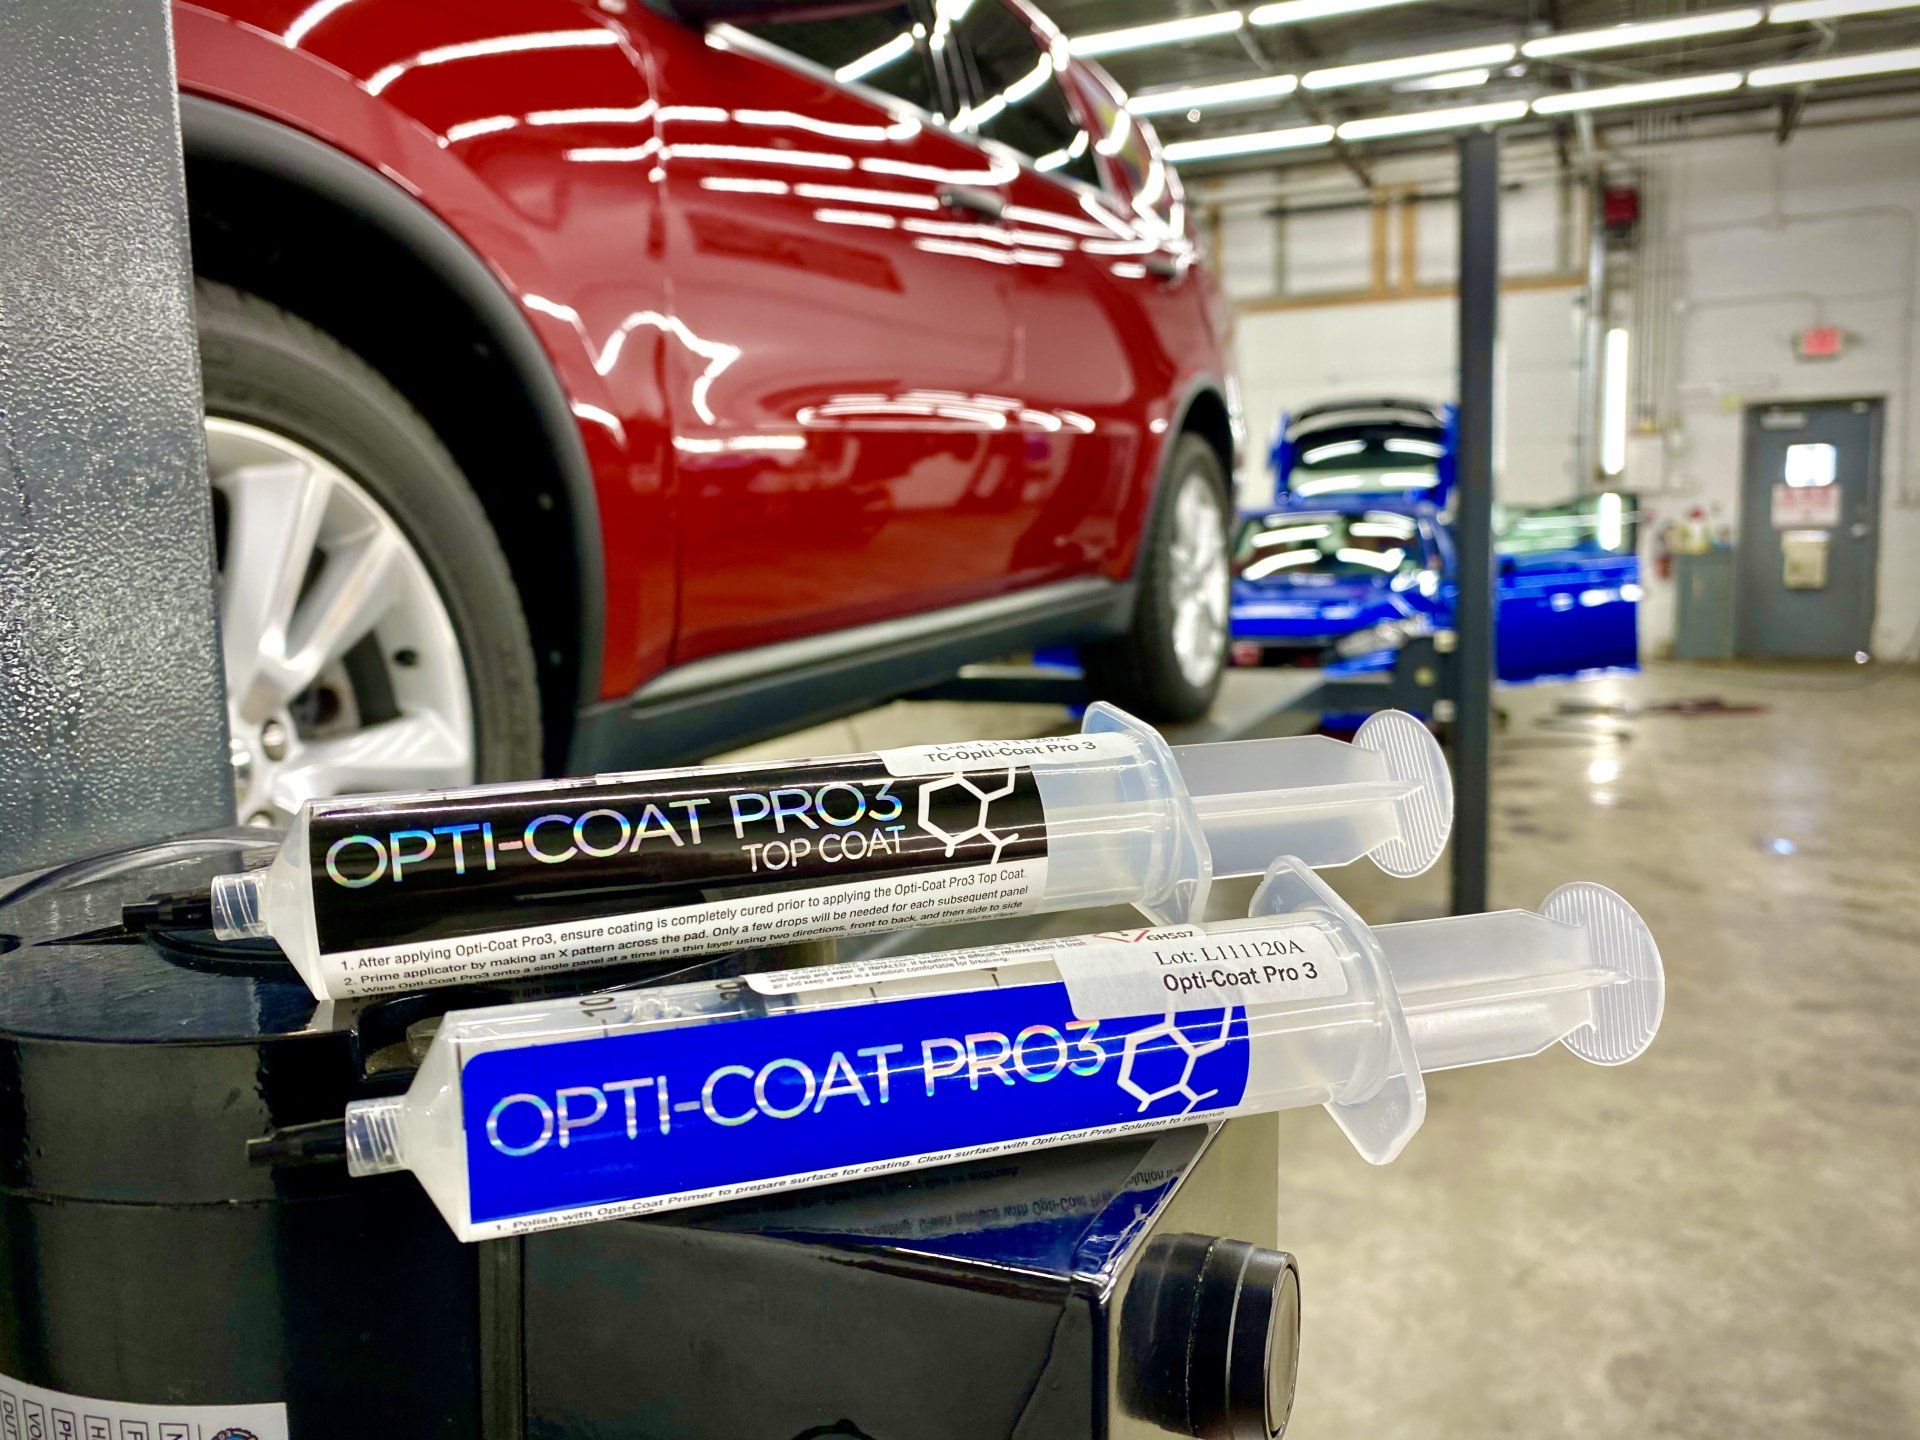
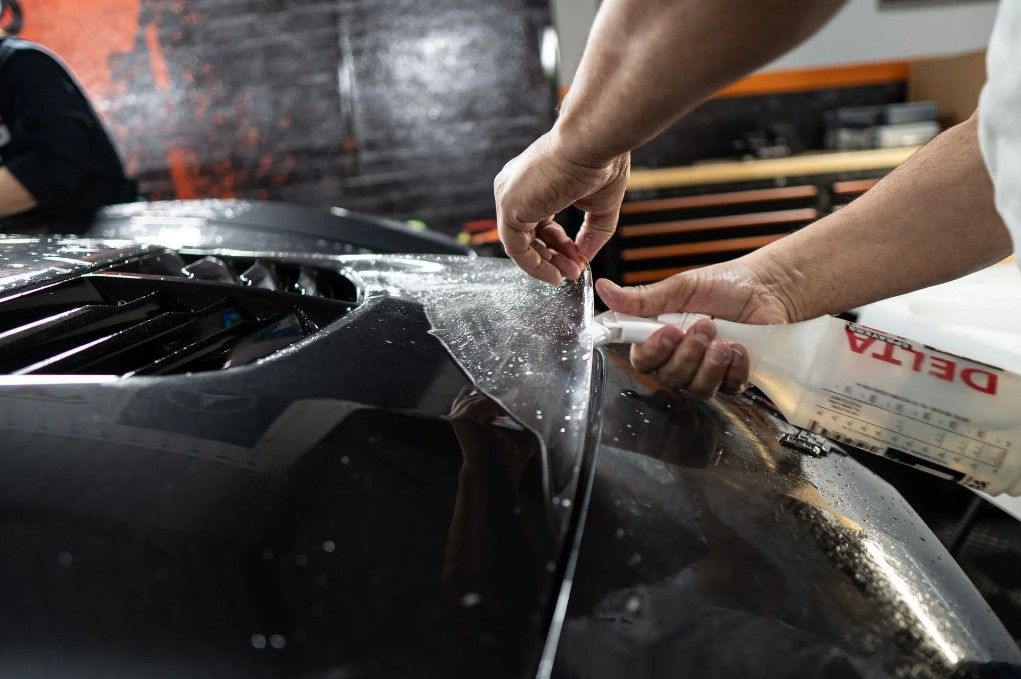
Film Cutting and Pattern Application
The actual PPF installation process involves precise cutting and careful application of the film to your vehicle's painted surfaces. Professional installers use patterns specific to your vehicle's make and model, ensuring proper coverage without excess material or gaps.
Modern PPF installation relies on computer-cut patterns that match your vehicle's exact dimensions and curves. These patterns account for body lines, edges, and complex curves that make each vehicle unique. The precision of pre-cut patterns eliminates the risk of cutting on the vehicle, which protects your paint from accidental damage.
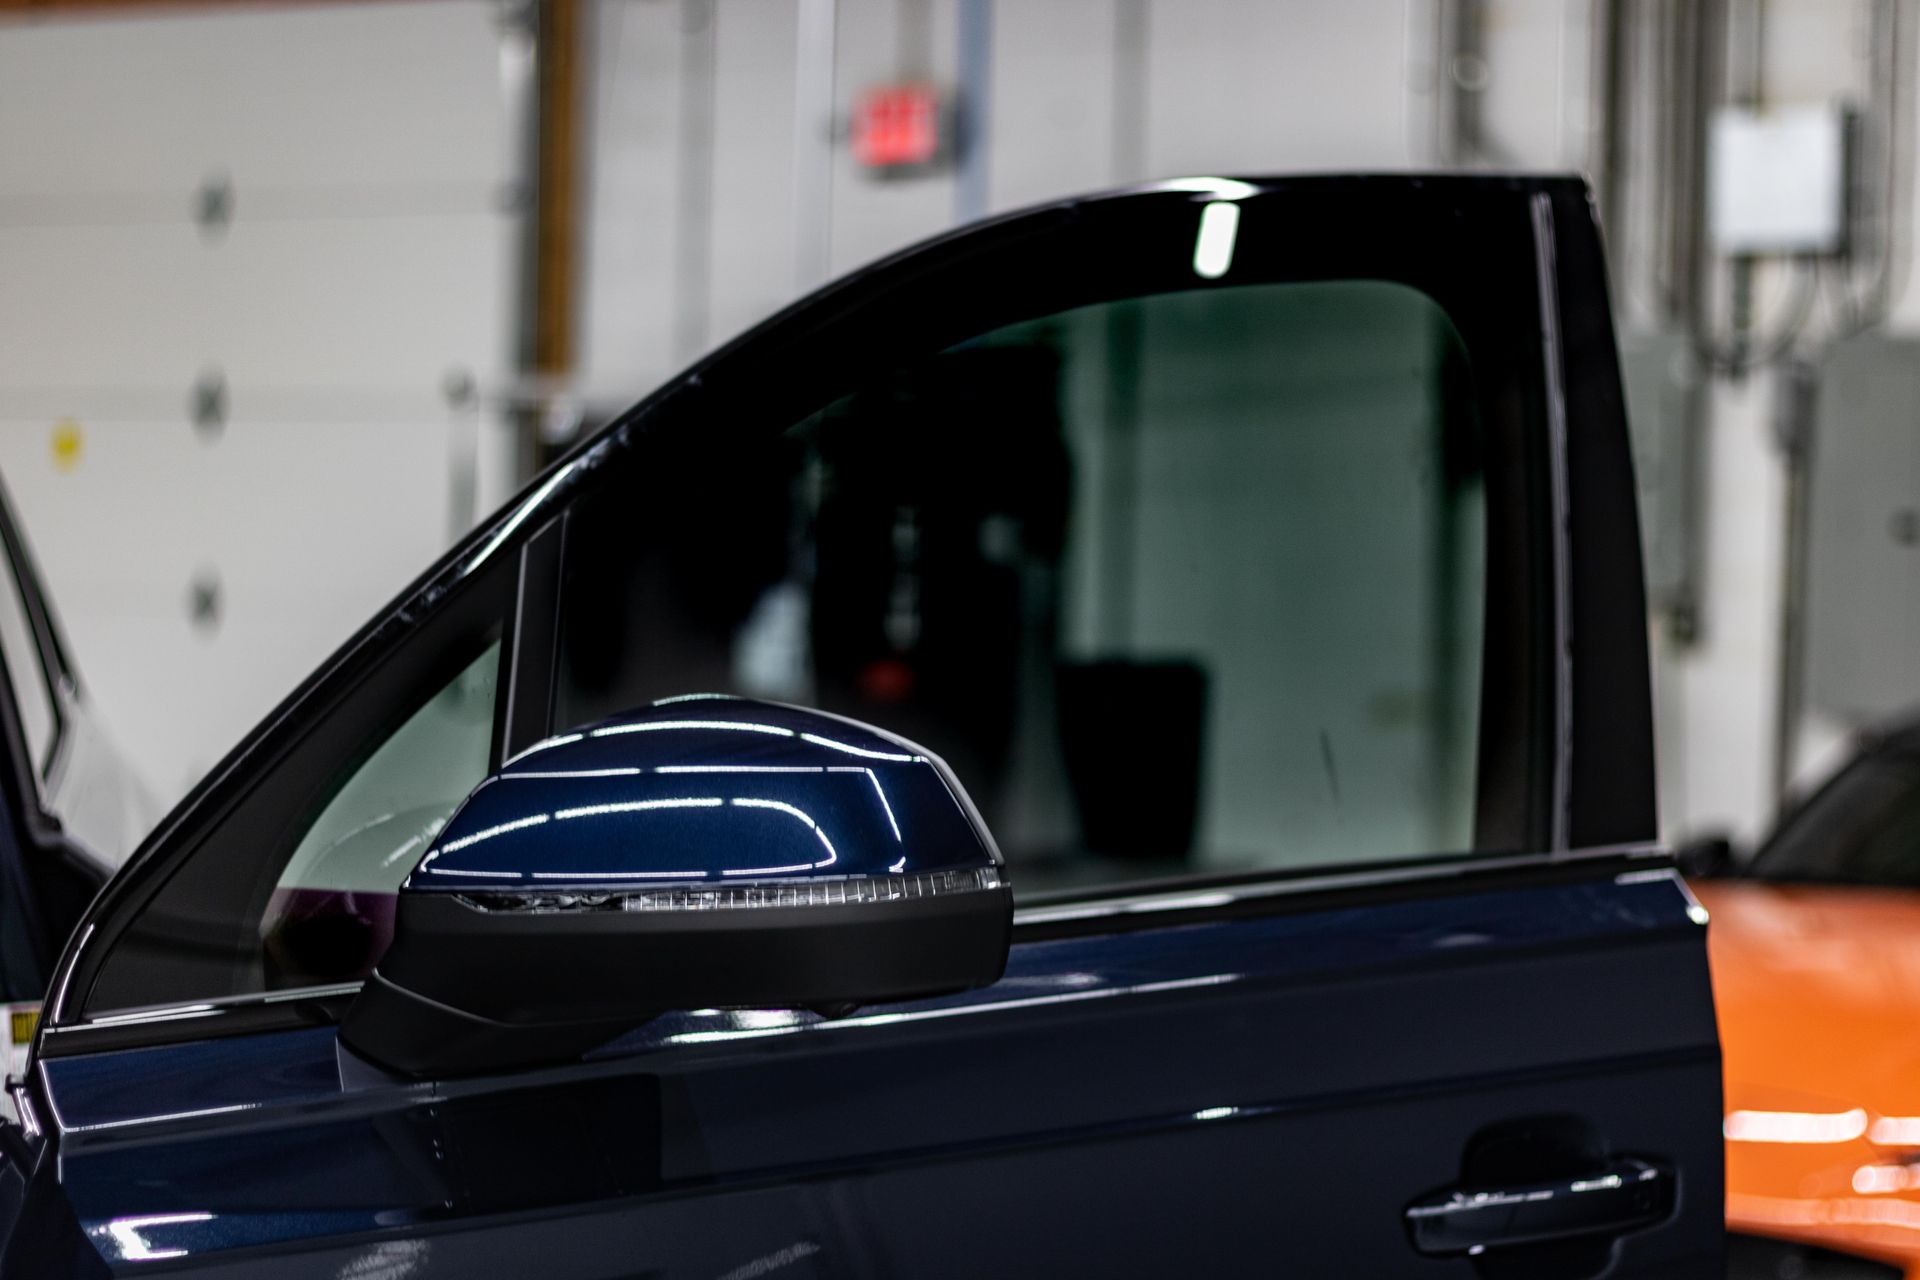
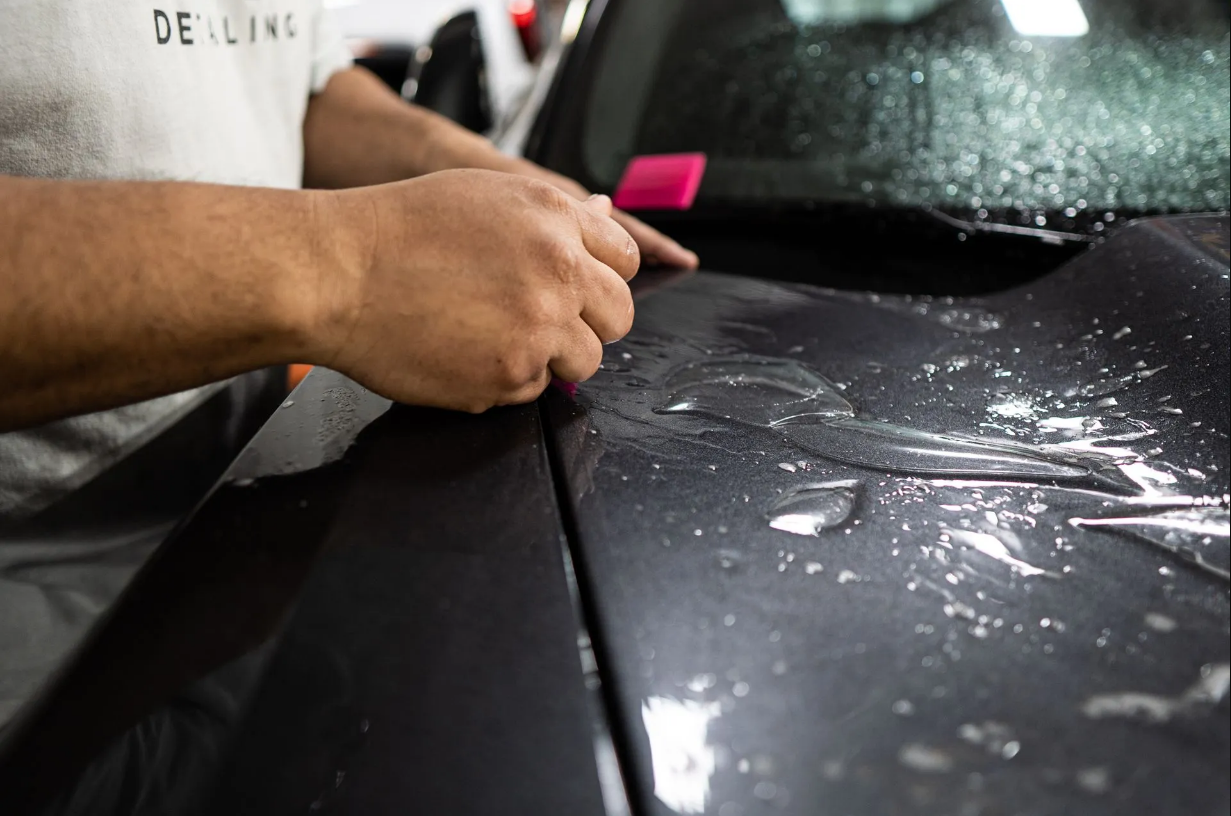
Film application happens panel by panel, with installers working methodically to ensure proper positioning and adhesion. The film gets positioned on the panel, adjusted for perfect alignment, and then squeegeed to remove the application solution and activate the adhesive. This process requires skill and patience—rushing creates bubbles, wrinkles, or misalignment that compromise both appearance and protection.
Complex areas like mirrors, door handles, and curved panels demand extra attention during the PPF installation process. These areas often require multiple pieces of film with precise overlaps or special techniques to achieve seamless coverage. The difference between amateur and professional installation becomes most obvious in how these challenging areas are handled.
Curing Time: Why Your Vehicle Stays at the Shop
After the film application completes, your vehicle isn't immediately ready for pickup. The curing phase of the PPF installation process allows the adhesive to bond properly and for any application solution to evaporate completely.
Film needs time to settle into the paint's microscopic texture and achieve full adhesive strength. During this phase, the film might appear slightly hazy or show small water spots where the application solution remains trapped. This is completely normal and resolves as the film cures.
The environment during curing matters significantly. Temperature and humidity affect how quickly film cures and how well it conforms to the paint surface. Professional facilities control these conditions to optimize curing, which is something you can't replicate in a home garage.
Attempting to rush the curing process by taking the vehicle too early creates problems. The film might not have achieved full adhesion, making it vulnerable to lifting or peeling at the edges. Water spots might not have fully evaporated, leaving permanent marks. Patience during this phase protects your investment in the PPF installation process.
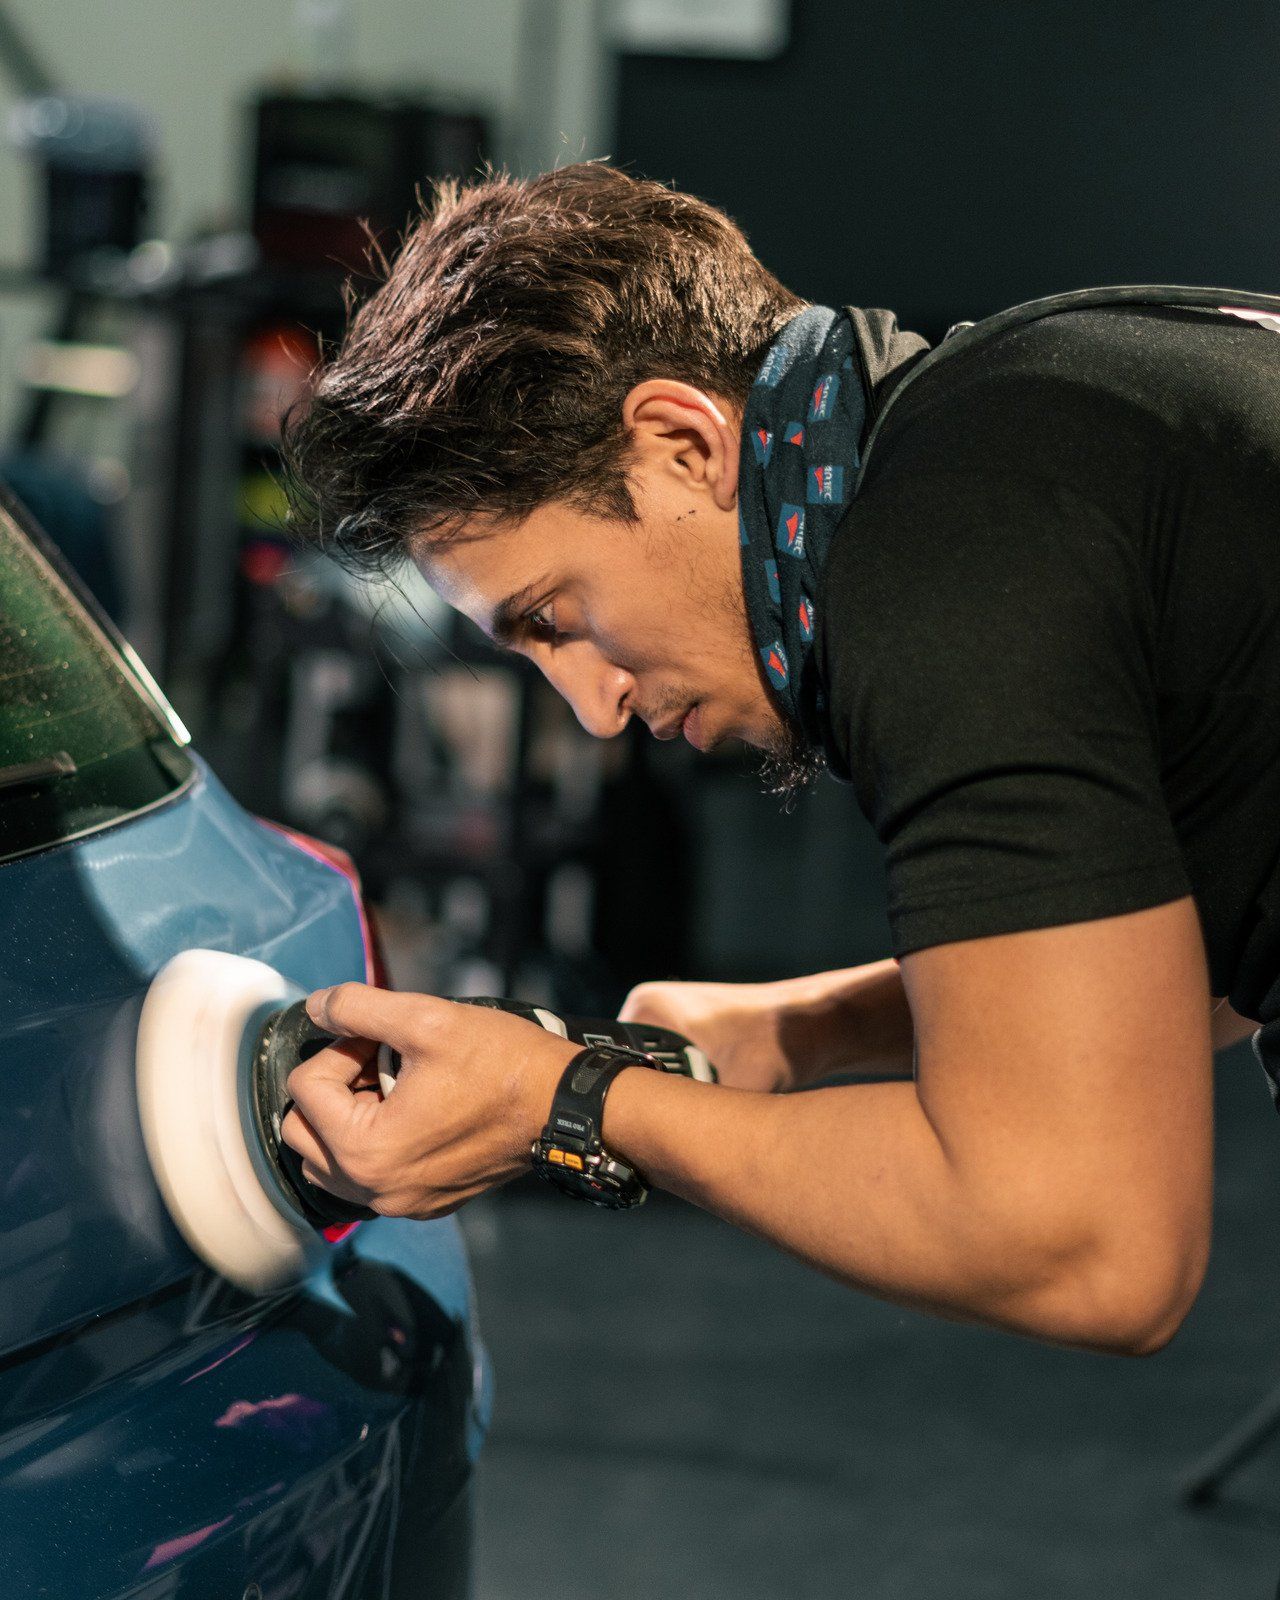
Final Inspection and Quality Check
Before you get the call that your vehicle is ready, the installation team performs a comprehensive final inspection of all applied film. This quality check ensures everything meets the standards you expect and the standards the facility demands of its own work.
The inspection looks for several specific quality markers. Film edges must be properly sealed with no lifting or gaps. The surface should be crystal clear with no bubbles, wrinkles, or contamination trapped under the film. All seams and overlaps should be virtually invisible and positioned in appropriate locations.
Any issues discovered during final inspection get addressed before your vehicle is released. This might mean reapplying a section of film or performing additional detailing work to ensure perfect results. Professional facilities stand behind their work and won't deliver a vehicle that doesn't meet quality standards.
The final inspection also includes cleaning the vehicle and removing any residue from the installation process. Your vehicle should look showroom-fresh when you pick it up, with the paint protection film virtually invisible except for the way it enhances your paint's gloss.
Vehicle Pickup and Aftercare Instructions
When you pick up your vehicle, you'll receive specific instructions for caring for your newly installed PPF. Following these guidelines during the first few weeks ensures the film achieves maximum durability and performance.
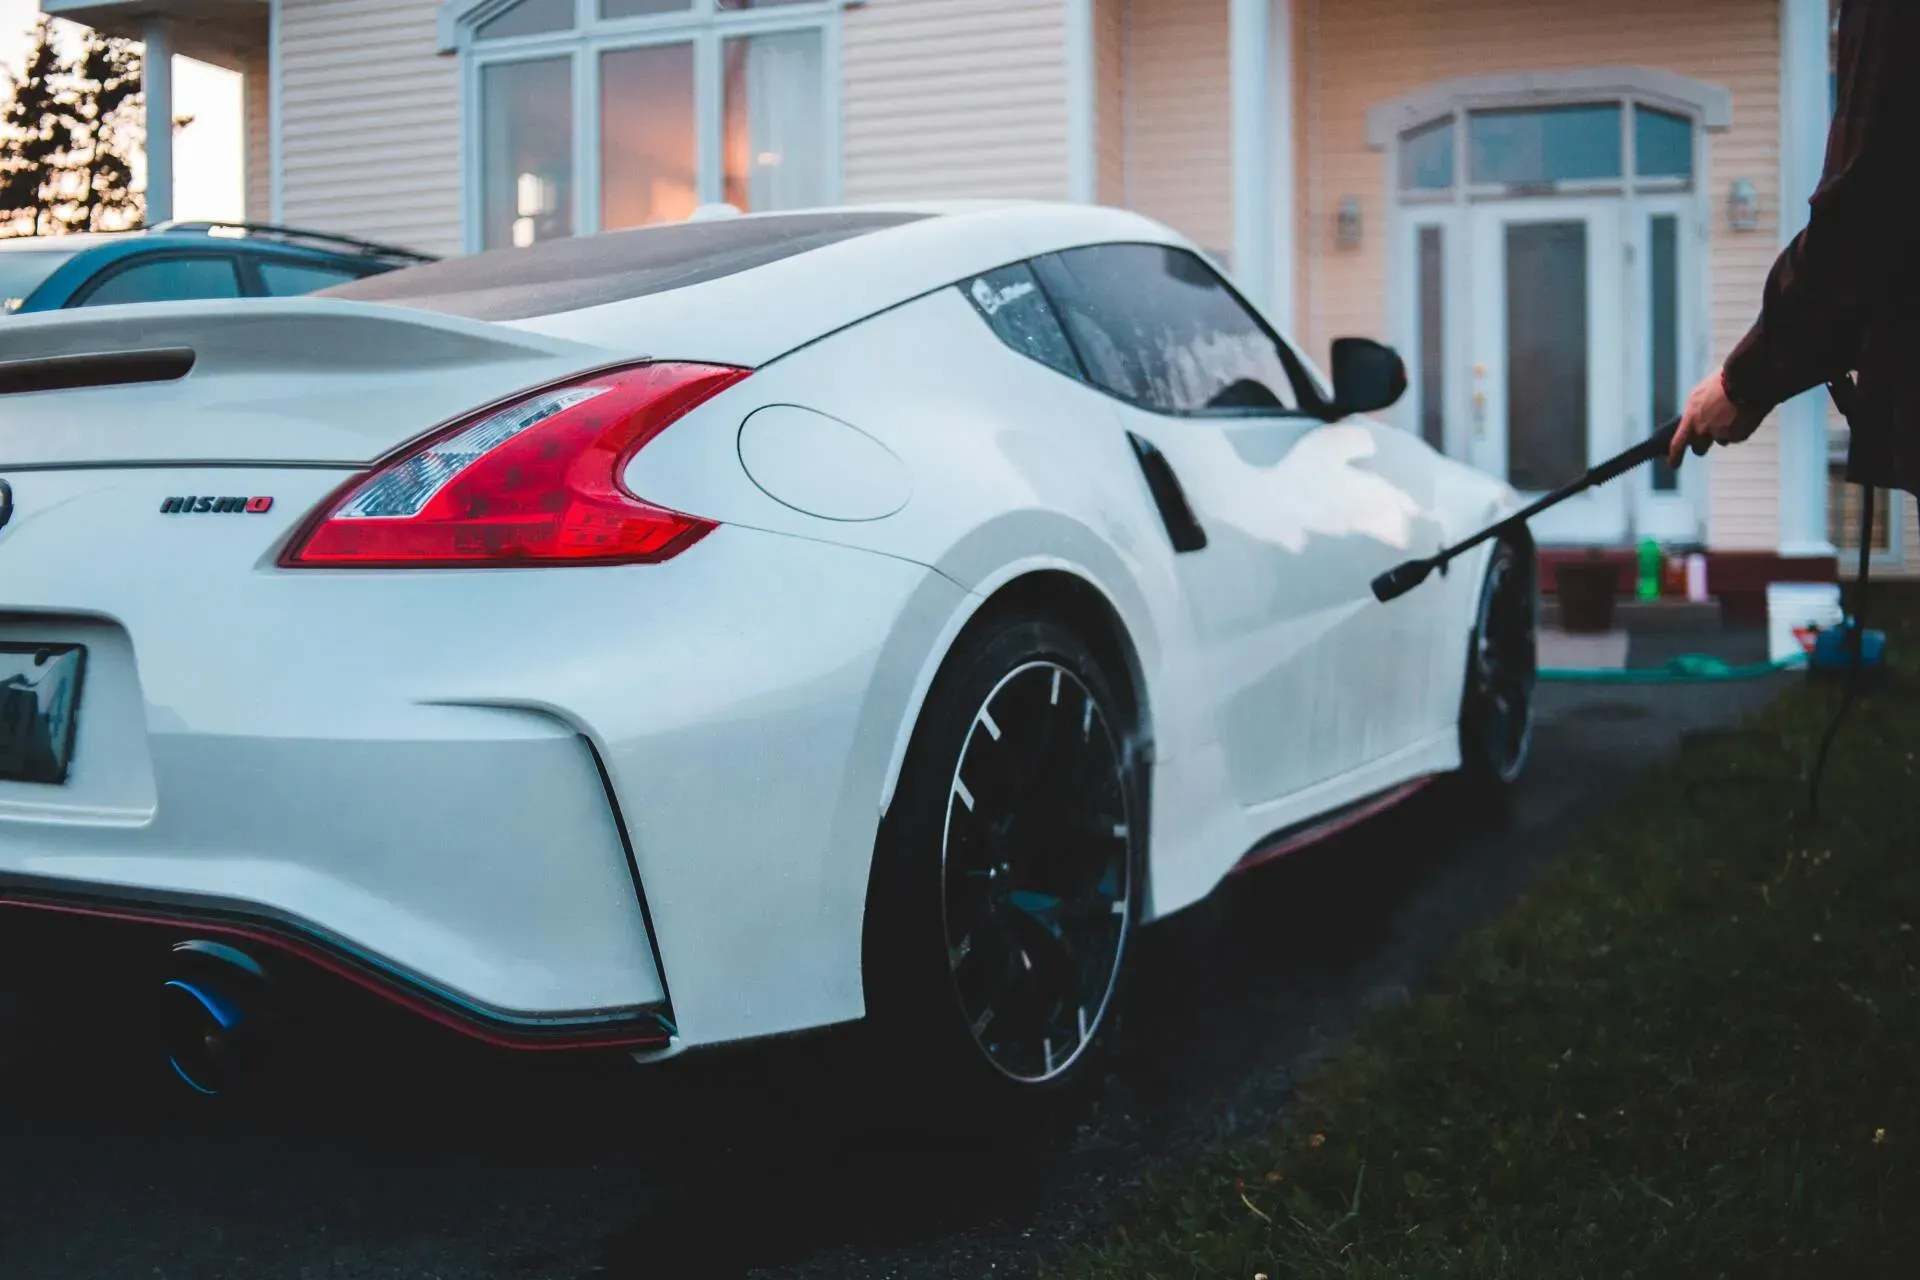
The initial period after the PPF installation process requires some temporary restrictions. You'll want to avoid washing the vehicle to give the adhesive time to fully cure. Hand washing is preferred over automatic car washes once the initial curing period ends. These guidelines aren't forever—they're just temporary measures to protect the film while it reaches full strength.
You'll also learn about the film's self-healing properties and how to activate them. Minor marks and swirls in the film's top coat can often heal with heat application from hot water or sun exposure. Understanding this capability helps you maintain the film's appearance without unnecessary concern over minor surface marks.
Long-term care instructions cover recommended cleaning products, what to avoid, and when to seek professional assistance for film maintenance. Quality PPF requires minimal special care, but knowing the guidelines prevents accidental damage and keeps your protection looking great for the long haul.
Understanding the Complete Timeline
The complete PPF installation process requires proper time from vehicle drop-off to pickup. The exact duration depends on the coverage level you've chosen and your vehicle's specific characteristics.
Partial coverage focusing on high-impact areas has different requirements than full vehicle wraps. Simple, flat panels have a different complexity than curves and body lines. Larger vehicles with more surface area have different considerations than compact cars.
Planning for your vehicle to be at the shop involves coordinating alternative transportation during the installation period. Most customers arrange rides, use rental vehicles, or schedule installation during times when they can manage without their primary vehicle. The convenience of the professional
PPF installation process is worth the temporary inconvenience of being without your vehicle.
Making the Professional Choice
Choosing professional installation for your paint protection film means investing in a process that delivers results DIY approaches can't match. The equipment, environment, expertise, and time required for proper installation justify the professional route.
The PPF installation process protects one of your most valuable assets—your vehicle. Cutting corners on installation to save time or money often results in film failure, poor appearance, or damage that costs more to fix than professional installation would have cost initially.
Understanding what happens during professional installation builds confidence in the process and helps you appreciate the value you receive. It's not just about applying film—it's about doing it correctly so the protection lasts and looks flawless for the long haul.
Get Started with Professional Installation
Ready to protect your vehicle with a professional PPF installation process that delivers lasting results? Connect with A&G Auto Spa to schedule your consultation and learn more about the coverage options that make sense for your vehicle. Our team will walk you through every step and ensure you know exactly what to expect throughout the installation process.
Frequently Asked Questions
Can I drive my vehicle immediately after PPF installation?
Your vehicle is ready to drive when you pick it up after the PPF installation process completes. However, there are temporary care restrictions during the initial curing period. Avoid washing the vehicle initially to allow the adhesive to fully cure. Regular driving is fine, but you'll want to be mindful of the film during the initial curing phase to ensure it achieves maximum adhesion and durability.
What happens if my paint needs correction before PPF installation?
Paint correction can be integrated into the PPF installation process when necessary. Surface imperfections like swirl marks, light marks, or oxidation should be addressed before film application since PPF preserves your paint's current condition rather than improving it. The initial inspection identifies any paint correction needs, and this work happens during the surface preparation phase before film application begins, ensuring your protected surface looks absolutely flawless.
How do I know if DIY PPF installation is worth attempting?
DIY PPF installation process attempts rarely match professional results due to the specialized equipment, controlled environment, and expertise required for proper application. Professional installation includes vehicle-specific patterns, proper surface preparation, and climate-controlled curing that DIY approaches cannot provide. The film itself represents a significant investment, and professional installation ensures that investment delivers the protection and appearance you expect rather than risking film failure or poor results.
Does the installation process differ for matte versus gloss PPF?
The PPF installation process remains essentially the same whether you choose matte paint protection film or gloss film. Both require identical surface preparation, application techniques, and curing procedures. The difference lies in the film's finish characteristics rather than how it's installed. Matte film requires the same precision and care as gloss film to achieve seamless results that blend perfectly with your vehicle's finish and deliver lasting protection.